Using
Different Web Browsers with Coded UI Tests 2013
Coded
UI tests can automate testing for web applications by recording or hand coding
your tests using Internet Explorer. You can then customize your test and play
it back using either Internet Explorer or other browser types for these web
applications.
Coded UI Tests help automate
browser based applications built on Internet Explorer. We can do now cross-browser
testing of applications. Users will be able to perform functional testing of
web applications across IE/Firefox/Chrome. One can use IE to record tests
and validate control properties using Coded UI Test Builder. Users also have an
option to hand code cross browser tests. If user needs to playback on IE, he/she
can click on Run All in Test Explorer which plays back the recording using
Coded UI inbuilt IE Plugin. On the other hand, if the user needs to playback on
non-IE browser, he/she can set BrowserWindow.CurrentBrowser as “firefox” or “chrome” in the test
depending on which browser he/she wants to test before running from the test
explorer. In this case, Coded UI Engine communicates with Selenium Web
Driver to execute the playback.
Ø BrowserWindow.CurrentBrowser =“firefox” or “chrome”;
Requirements
- Visual Studio Ultimate or
Visual Studio Premium
- Operating systems:
- Microsoft Windows 7
- Microsoft Windows 8
- Microsoft Windows Server 2008
R2 SP1
- Web browser versions:
- Windows Internet Explorer 9
- Windows Internet Explorer 10
- For supported versions of
Mozilla Firefox and Google Chrome.
- This installer works with VS
2012 Update 4, VS 2013 and VS 2013 Update 4.
- Supported Browser versions
The following versions of
browsers have been verified and are supported:
Firefox
33.
Latest version of
Chrome (version 38.0.2125.111 m as of 11/14/2014)
Features:
The
following features are available across the various web browsers:
- Recording support for actions
and validation on supported IE browsers
- Hand-coding scenarios support
for such things as control properties, search, and playback waiters.
- Support for popups and dialog
- Ability to execute basic
JavaScript with no return type
- Search resilience (via smart
match) and performance improvements
Known Limitations
- No support for Safari browser
- Browser launch needs to be part
of the UITest. In case you have a browser already open and you want to run
steps on the opened browser, playback will fail for non-IE browser
windows. Hence, it is advisable to have launch too as part of the test case.
- Automating browser based
actions such as Maximize/minimize/restore is not supported
What’s
supported across all web browsers?
- Add custom code for controlling
features such as properties, search, and playback waiters.
- Pop-ups and dialog boxes
- Execute basic JavaScript with
no return type
- Search resilience (using smart
match) and performance improvements
Why should I use coded UI
tests across multiple web browser types?
By
testing your web application using a variety of web browser types, you better
emulate the UI experience of your users who may run different browsers. For
example, your application might include a control or code in Internet Explorer
that is not compatible with other web browsers. By running your coded UI tests
across other browsers, you can discover and correct any issue before it impacts
your customers.
How do I record and play back coded
UI tests on web applications using the supported web browsers?
Recording: You must use the
Coded UI Test Builder to record your web application test using Internet
Explorer. You can optionally add validation and custom code for the tested
controls using a predefined set of properties as you would normally do for
coded UI tests.
Ø You cannot record coded UI tests using Google Chrome or
Mozilla Firefox browsers.
Play
back with Internet Explorer: When no browser is explicitly
specified, tests will run on Internet Explorer by default. You can explicitly
state the browser to be used by setting the BrowserWindow.CurrentBrowserproperty
in your test code. For Internet Explorer, this property should be set to IE or Internet
Explorer.
Play
back with non-Internet Explorer web browsers: To play back on non-Internet Explorer
web browsers, change BrowserWindow.CurrentBrowser property in your test code to
either Firefox or Chrome.
To
play back tests on non-IE web browsers, you must install the Selenium
components for Coded UI Cross Browser Testing.
Installing
Selenium components
- On the Tools menu,
choose Extensions and Updates.
- In the Extension and Updates
dialog box, search for Selenium components for Cross Browser
Testing.
- Highlight the extension and
choose Download.
Enable debugging
To
enable debugging your web application, you must complete the following
configuration options:
- Enable Just My Code:
- On the Tools menu,
choose Options and then choose Debugging.
- Select Enable Just My
Code.
- Disable CLR exceptions:
- On the Debug menu,
choose Exceptions.
- For Common Language
Runtime Exceptions, uncheck User-unhandled.
I
don't see the option to change BrowserWindow.CurrentBrowser in the coded UI
test.
You might be using a
version of Microsoft Visual Studio 2012 that does not support coded UI tests
using various web browsers. To use such coded UI tests, you must use Visual
Studio Ultimate with Visual Studio 2012 Update 4 or a later version
of Visual Studio Ultimate.
What else should I know?
Notes
·
Apple
Safari web browser is not supported.
·
The
action of starting the web browser must be part of the coded UI test.
If you have a web browser
already open and you want to run steps on it, the playback will fail unless you
are using Internet Explorer. Therefore, it is a best practice to include the
startup of your web browser as part of your coded UI tests.
·
Automating
browser specific based UI actions such as maximize, minimize and restore is not
supported.
2 Components
required for enabling Cross Browser feature
Component 1: Coded UI Test Cross Browser
Plugin
1. The plugin will be downloaded as part of
the VS Update
2. User does not have to follow any extra
steps for this
Component 2: Selenium components An
utility installer that downloads the following from Selenium website to an
appropriate folder on customer machine
1. Selenium .Net bindings
2. Selenium ChromeDriver The installer will be available
online through VS Gallery
3 Options
for Selenium components acquisition
Option 1: Discover from error message after
test failure
Start
writing cross browser tests without Selenium components ->Run the test ->Error
message displays a FwLink ->Copy the FwLink ->Open a browser and launch
the URL ->Run the installer
Option 2:
Discover from online VS Gallery
1.Visit online VS Gallery ->Search for
“Selenium components for Coded UI Cross Browser Testing -> Click on
Option 3: Discover from Visual Studio
Extensions
1. Open Visual Studio ->Tools ->Extensions and
Updates ->Online ->Visual Studio Gallery
->Search for “Selenium
components for Coded UI Cross Browser Testing -> Click on Download
Option 1: Discover from error message after
test failure
If previous steps were missed, user gets an error on
“Playback engine could not find Selenium binaries on your system”
User copies the error from Test Explorer to Notepad and
copies the URL
http://go.microsoft.com/fwlink/?LinkID=267598
P.S.: This was supposed to be displayed as a
link and we have filed a bug on Test automation.
Copy and Launch the link on IE:
http://go.microsoft.com/fwlink/?LinkID=267598
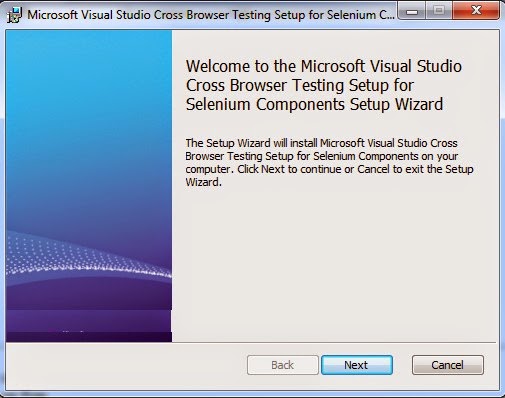
Click on Run.
Click on Next
You can view the Selenium license terms here
Click on Install
In case you do not want the installer to add
a firewall exception for Selenium chromedriver.exe, you can opt out by
unchecking the option.
The Install is in Progress
Click on Finish
In case of Connection error or any
interruption, users will see this dialog and an HTML page with manual download
details will automatically popup.
This is the HTML Page that pops up in case
there is an install failure the page contains manual instructions for download
of Selenium components.
We will publish details of the installer
download link via blogs Users can go to
https://visualstudiogallery.msdn.microsoft.com/11cfc881-f8c9-4f96-b303-a2780156628d
to access the Download link and details of acquisition.
Option 3: Discover from Visual Studio
Extensions
Click on Download


